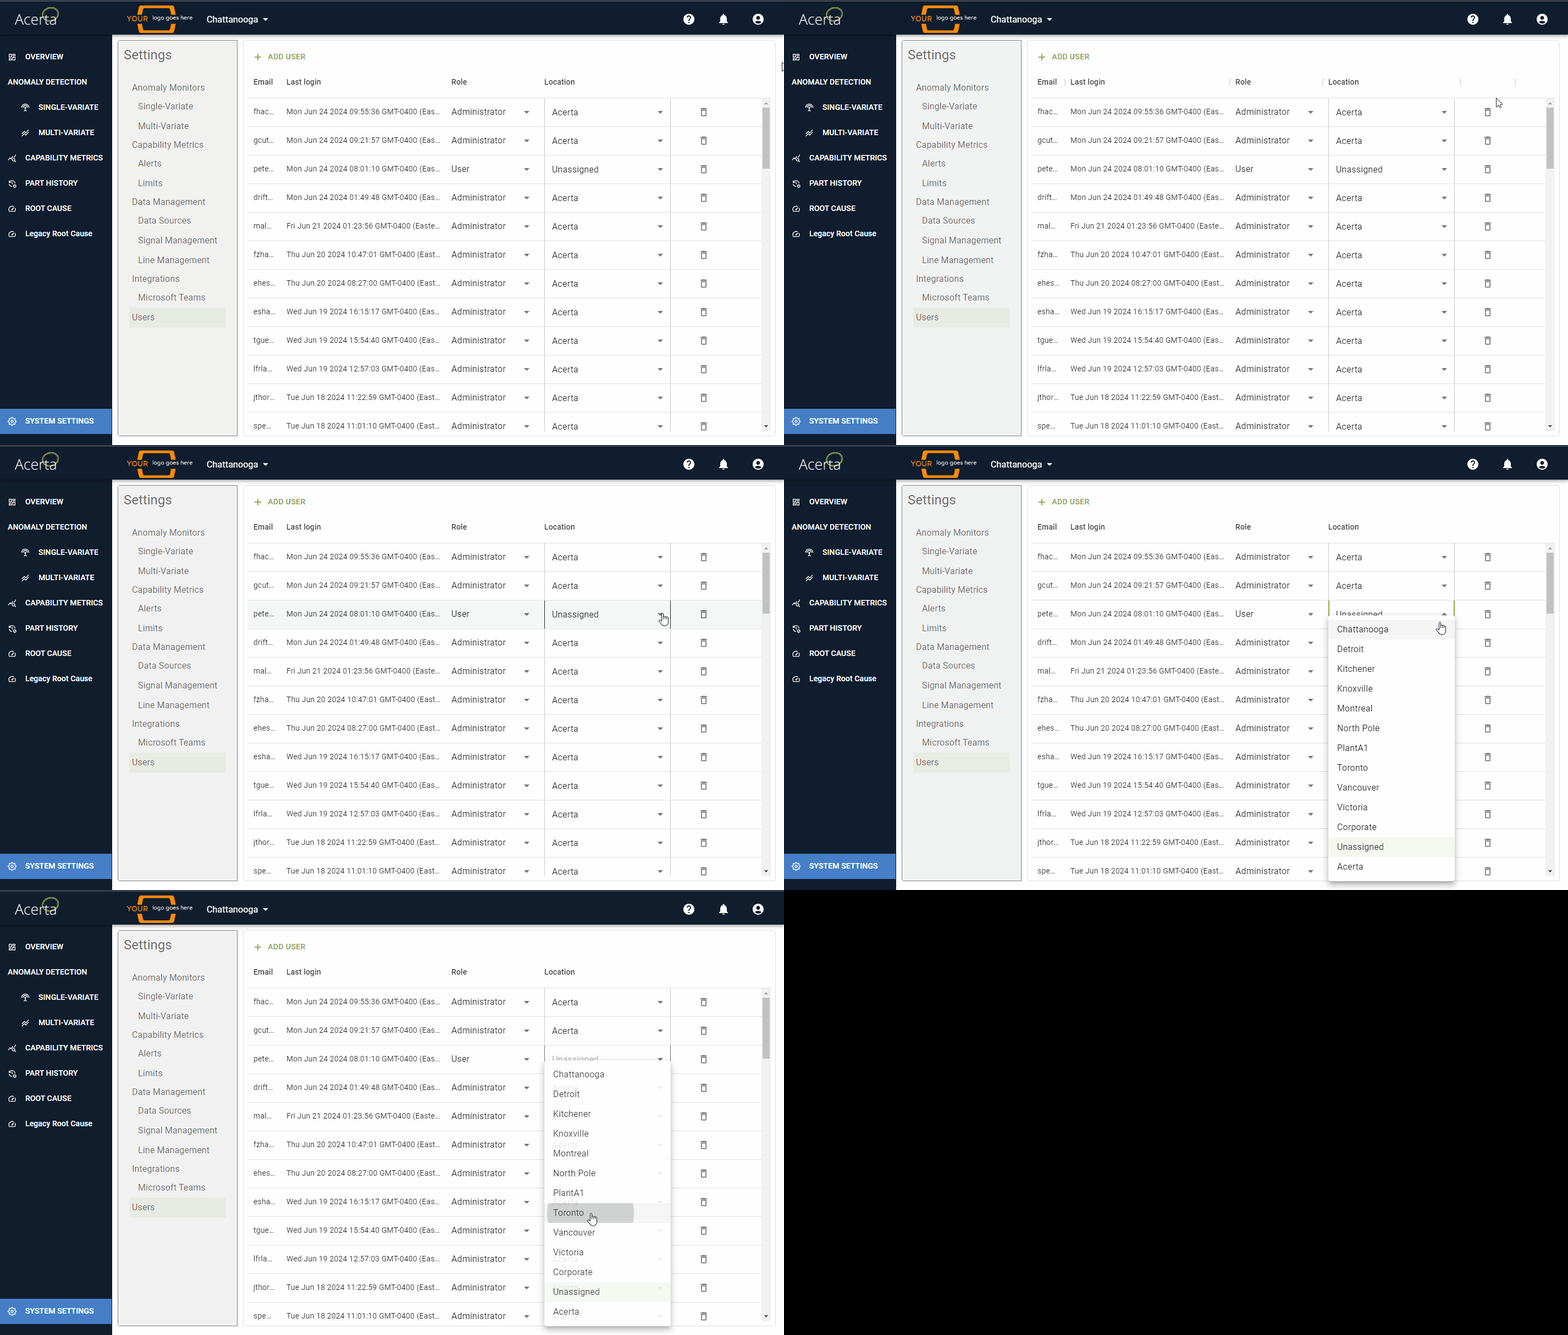
Settings | Users
![]() The Users settings screen is restricted to admins only.
The Users settings screen is restricted to admins only.
Configuring LinePulse Users
![]() See Working with Tables for tips on sorting, filtering and resizing LinePulse tables.
See Working with Tables for tips on sorting, filtering and resizing LinePulse tables.
To add a new user
From the Navigation menu, click SYSTEM SETTINGS.
The Settings menu appears.
Click Users.
The Users worklist appears.
Click + ADD USER.
LinePulse adds a new row to the Users worklist.
Enter the user's Email address.
Select a Role.
The options are User or Admin.
Click  .
.
LinePulse saves your changes and sends the new user a 'welcome' email. They will be required to follow a link from that email to create a password and activate their LinePulse account.
To toggle a user's administrator status
From the Navigation menu, click SYSTEM SETTINGS.
The Settings menu appears.
Click Users.
The Users worklist appears.
Select the Roles column for the user you wish to change.
A dropdown menu appears.
Click Administrator.
LinePulse toggles the selected user's administrator status.
If the user is now an administrator, the term 'administrator' will appear in the Role column; otherwise, LinePulse removes it.
![]() All users, including administrators, will display the term 'user' in the Role column.
All users, including administrators, will display the term 'user' in the Role column.
To change a user's location
From the Navigation menu, click SYSTEM SETTINGS.
The Settings menu appears.
Click Users.
The Users worklist appears.
Select the Location column for the user you wish to change.
A dropdown menu appears.
Select a plant or select Unassigned for a user who will not be assigned to a specific plant.
LinePulse updates the selected user's location.

To delete a user
From the Navigation menu, click SYSTEM SETTINGS.
The Settings menu appears.
Click Users.
The Users worklist appears.
For the user you wish to delete, click  .
.
A confirmation dialog box appears.
Click CONFIRM.
LinePulse deletes the selected user.
Last modified: August 02, 2024